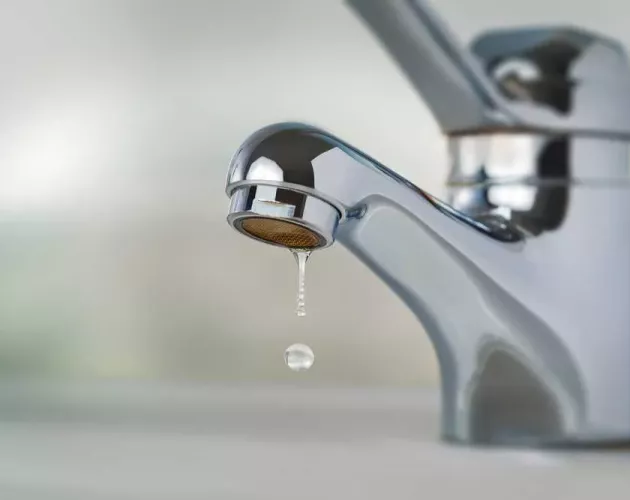
A dripping faucet is one of the most common household plumbing nuisances, yet many DIY repairs start with an unnecessary trip to the hardware store. Homeowners often purchase generic washer kits or random replacement cartridges only to discover upon disassembly that their faucet uses an entirely different mechanism, has cracked internal brass, or simply suffers from mineral scale accumulation.
Taking twenty minutes to systematically diagnose the leak before buying parts saves money, prevents multiple trips to the store, and ensures you disassemble only what is necessary.
Here is a practical, step-by-step diagnostic guide to pinpointing the exact failure point of your faucet before spending money on replacements.
1. Pinpoint the Physical Origin of the Water
Before shutting off the water or loosening screws, observe where the water is escaping while the fixture is under normal household pressure. A leak from the spout tip points to an entirely different failure than water pooling around the base.
+---------------------------+-----------------------------------+-----------------------------------------+
| Leak Symptom              | Most Likely Underlying Cause      | Primary Component at Fault              |
+---------------------------+-----------------------------------+-----------------------------------------+
| Constant drip from the    | Internal seal failure allowing    | Worn compression washer, seat washer,   |
| aerator / spout tip       | line pressure past valve seat     | or deteriorated internal cartridge/ball |
+---------------------------+-----------------------------------+-----------------------------------------+
| Water pools around the    | Stem seal or body O-ring          | Degraded O-rings or loose bonnet nut    |
| handle base when in use   | compromised under flow            | inside handle assembly                  |
+---------------------------+-----------------------------------+-----------------------------------------+
| Water leaks around base   | Spout O-ring wear or loose body   | Swivel spout base O-rings; deteriorated |
| of spout when swinging it | seal under backpressure           | aerator causing pressure backup         |
+---------------------------+-----------------------------------+-----------------------------------------+
| Water seeps under the     | Deck gasket failure or loose      | Deteriorated base gasket, loose deck    |
| sink basin onto floor     | supply line connection            | nuts, or leaking supply riser           |
+---------------------------+-----------------------------------+-----------------------------------------+
The Hot vs. Cold Diagnostic Test
If your faucet drips steadily from the spout tip, determine which supply line is failing so you only service the compromised side:
-
Turn off the hot water shutoff valve beneath the sink, leaving the cold valve fully open.
-
Wait 10 to 15 minutes.
-
If the drip stops, the leak originates from the hot water valve mechanism. If the dripping continues at the exact same pace, reopen the hot valve and close the cold valve to verify the reverse.
2. Identify Your Faucet Type
Different faucet engineering designs fail in distinct ways. Identifying your faucet mechanism determines what internal parts exist inside:
-
Compression Faucets (Two Handles): Typically found in older homes. The handles require several full turns to go from completely shut to fully open. They rely on rubber washers pressed against brass valve seats. A leak usually indicates a compressed, hardened rubber washer or a scored brass seat.
-
Ceramic Disc Faucets (Single or Double Handle): Require only a quarter-turn or smooth single-lever movement. They house polished ceramic discs. Leaks usually stem from sediment scratching the disc face or deteriorated rubber inlet seals beneath the cartridge cylinder.
-
Cartridge Faucets (Single or Double Handle): Operate with smooth up-and-down or rotational motion. Water flow is controlled by internal channels in a brass or plastic cartridge cylinder. Leaks typically stem from worn exterior rubber O-rings or degraded internal cartridge channels.
-
Ball Faucets (Single Lever): Common in older kitchen fixtures with a single dome-shaped handle. They utilize a slotted metal or plastic ball over spring-loaded rubber seals. Leaks are almost always caused by fatigued springs or eroded rubber seat cups.
3. Safe, Non-Destructive Preliminary Checks
Before heading to the store, perform basic non-destructive checks that frequently resolve or clarify the problem without requiring replacement parts.
Step 1: Check the Aerator for Mineral Backpressure
Mineral buildup in hard-water areas can create abnormal backpressure inside the faucet spout, forcing water past aging internal O-rings.
-
Unscrew the aerator from the spout tip by hand or using pliers wrapped with protective electrical tape.
-
Clear any trapped grit or soak the aerator in warm white vinegar for 30 minutes to dissolve calcium deposits.
-
Run the faucet without the aerator. If a base leak stops, the issue was backpressure caused by a restricted aerator screen.
Step 2: Inspect Handle Fasteners and Bonnet Nuts
Over months of daily use, handle retaining screws and internal packing nuts can work loose under repeated torque.
-
Pop off the decorative handle index cap (usually marked “H” or “C”) using a thin flat-head utility blade.
-
Tighten the interior handle screw if loose.
-
Check the hex-shaped bonnet nut or retaining ring holding the cartridge in place. If it has loosened slightly, snug it down gently with an adjustable wrench. A loose bonnet nut allows water to bypass the top stem seal.
4. Inspection and Disassembly Before Purchasing Parts
If non-destructive checks confirm an internal component failure, safely extract the internal part to inspect it before buying a replacement.
Step 1: Isolate the Supply Lines
Always close both shut-off valves under the sink before disassembling the faucet body. Open the faucet handles completely to bleed residual line pressure and verify that water flow has stopped completely. Place a clean microfiber cloth or washcloth over the sink drain opening to prevent screws and small washers from falling down the waste pipe.
Step 2: Remove the Internal Mechanism for Visual Inspection
Carefully lift out the handle, unscrew the retaining collar, and pull out the stem, cartridge, or ball assembly:
-
Rubber Washer Check: If you have a compression stem, inspect the bottom rubber washer. Is it flattened, brittle, cracked, or missing a chunk? If so, only an inexpensive rubber washer needs replacement.
-
Valve Seat Check: Shine a flashlight down into the faucet body cavity. Run your finger along the brass valve seat at the bottom. If the rim feels grooved, pitted, or rough, a new rubber washer will fail within weeks; the seat itself must be resurfaced or replaced.
-
Mineral Scaling on Cartridges: If a ceramic cartridge is intact but coated in chalky white scale, an overnight soak in white vinegar may restore smooth sealing without replacing the entire unit.
Step 3: Match the Part Exactly
Faucets do not use universal cartridges. Take the extracted part, stem, or worn seal directly to the hardware store or take clear photos of the cartridge model stamp, spline count (the number of ridges on top of the stem), and overall length to ensure an exact match.
5. When to Call a Licensed Professional
While replacing a washer, O-ring, or drop-in cartridge is suitable for beginner DIYers, certain symptoms indicate deeper systemic problems requiring a licensed plumber:
-
Frozen or Leaking Shut-Off Valves: If the under-sink shutoff valves do not completely stop water flow, or begin dripping when turned, the angle stops must be replaced before the faucet can be serviced.
-
Cracked Castings: If hairline cracks appear across the interior brass or composite faucet housing, the fixture cannot be sealed with replacement parts and the complete faucet must be replaced.
-
Corroded Supply Risers: Rigid copper or corroded braided supply lines that twist or deform when loosened risk snapping under pressure, which can cause significant water damage.
Frequently Asked Questions
Can a dripping faucet cause damage if left unaddressed?
Yes. Beyond wasting hundreds of gallons of water annually, a slow leak around the base of the fixture can seep through the sink deck, degrading laminate countertops, rotting sub-cabinet wood, and encouraging hidden mold growth beneath the basin.
Why does my faucet still drip after replacing the rubber washer?
The most common cause is a damaged brass valve seat inside the faucet housing. If the seat is rough or pitted from mineral deposits, the new rubber washer cannot make a watertight seal. The seat must be smoothed using an inexpensive valve seat dressing tool or unscrewed with a seat wrench and replaced.
Is it always cheaper to replace parts rather than buy a new faucet?
For mid-range to high-end fixtures with easily accessible cartridges, replacing a $15–$30 cartridge or a $2 washer is far more cost-effective. However, for inexpensive entry-level faucets with severe body corrosion or discontinued internal parts, installing a new fixture is often more practical.
Do single-handle faucets use washers?
Most modern single-handle faucets do not use traditional flat compression washers. Instead, they utilize ceramic disc cartridges, internal sleeves, or ball assemblies paired with small spring-loaded rubber cup seals.